
I have previously written a couple of posts such as what's inside my bag and purse and I enjoyed writing them so much that I thought I would write a similar post, but include the things that are in my room. This is pretty much going to be a room tour, and I'm going to show off the room that I redecorated myself with the help of my friends. Although I decorated about 3 years ago now, I still love my room and the way it looks but I also love to add new accessories and features every once in a while.

Right next to my bed I have this little bedside table with three drawers. In the top drawer is all my important things and stuff like notepads and stationary. In the second drawer I keep all my haircare and body products and the final drawer is just a random drawer full of junk!
On the top of the table is a whole host of products and necessities as well as my little lamp which is touch sensitive so I never have to spend time looking for the switch.

On the bedside table itself I have two remotes, one for my tv and one for my stereo although it doesn't actually work at the moment because the batteries are dead. I also have a mirror and I keep my makeup bag here. I'm actually really bad and I put my makeup on here which means I can lay in bed and do it! I also have a few beauty products such as moisturiser and cleanser as well as all my makeup brushes. I actually used some leftover wall paper and placed in underneath the glass so that my bedside table matches my feature wall.

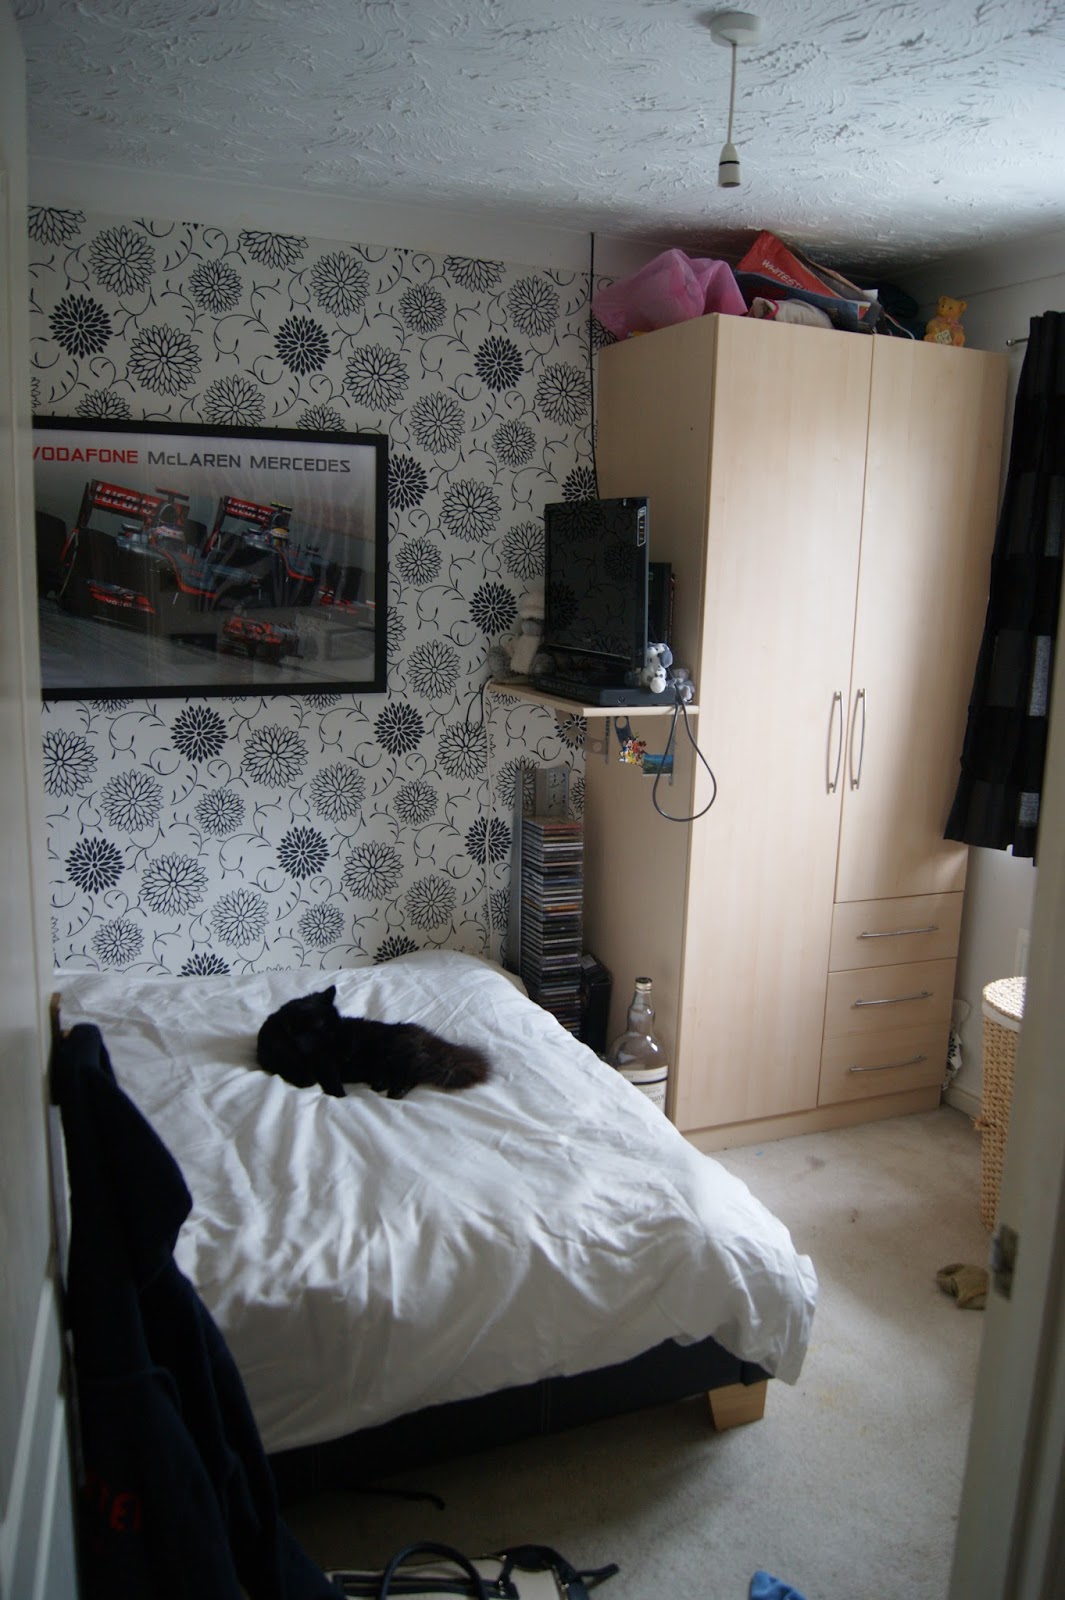
Next to my bedside table I have my single wardrobe. Inside this is a hanging rail and also a shelf and so I use this wardrobe to hang all my bottom half clothes such as leggings, jeans and maxi skirts. I also use the shelf to store my jumpers and hoodies when it's summer and I also have my shoes at the bottom of this wardrobe. You can also see the back of my door in the shot above and on the back I have all the jackets and coats that could possibly fit there.

Then, above my bedside table and bed I have a lot of storage cupboards that go all the way across my wall. In the first single cupboard I have loads of denim jeans or shorts that I don't wear very often and is awaiting a proper sort out. Next in the middle double cupboard I have all my pyjamas and comfortable things that I wear around the house like tracksuit bottoms and finally in the last cupboard are all my dvds and books.

Underneath all the overhead cupboards I have two large photo frames which I have made collages out of. Again I've used leftover wall paper for the background of the photo frames and this is a simple way of making the whole room look as though it matches. Next I have a certificate from Red Bull Racing that I received when I was part of their 'faces of charity' campaign and finally I have two canvases which were painted by my friend and given to me as a birthday present.

These two canvases were made for me the same year that I decorated my bedroom. My friend had taken a bit of the wallpaper home and at the time I had no idea why. It all became clear when I received these for my birthday a few weeks later, and they've been a part of my bedroom ever since!

The wall that you see straight ahead when you enter my room and the wall next to my overhead cupboards is the main feature wall. Before I started to decorate I knew that I wanted one feature wall and then keep the rest of the room quite neutral. Therefore I opted for a creamy-white paint for the walls and this beautiful monochrome floral wallpaper for the feature wall. Originally I was going to keep this wall completely free of anything else but then I had no-where to put my massive F1 poster. I think it is A1 in size and it is huge! This is the official 2012 poster for McLaren and because they haven't released one for 2013 I haven't been able to update it so as far as my room is aware, Lewis Hamilton still races for them ;)

Near the poster is a shelf which contains my tv. This shelf also backs onto my other wardrobe. As well as my tv I also have a DVD player and a few me to you bears which have been gifts over the years.

Behind my TV is my sneaky collection of Formula One & car related books. These include an encyclopaedia of F1 and one of the many books written by Jeremy Clarkson. My Jake Humphrey book is also meant to live here, but I think that was accidentally put into my book cupboard. This collection is ever-growing so I think they might need a new home soon somewhere else in my bedroom.

Underneath my TV and at the end of my bed I have my collection of CD's. It is usually full but since I've had my car some of my favourites are now living in there. I've also got a box for a pair of curlers and some makeup which I don't use very often here too.

Then in-front of the CD rack is two more storage cases full of makeup and other beauty related items such as brushes. I really need to go through these and get rid of the makeup that I don't use so that is on my to-do list. Then I have this old whiskey bottle which I use to collect 1p's and 2p's. I am aiming to fill it completely to the top and then convert the money and I think at the moment I've got £15 in there just in pennies!

This is my second wardrobe. It is much bigger than the one I use to store trousers and shoes and it also contains drawers. In the drawers live my underwear and socks and skirts and in the main wardrobe are all my tops, dresses and any other jackets. This wardrobe also has a shelf and on this I keep boxes and blankets and other random items.

Continuing to move around my room, to the right of the double wardrobe is the window. Underneath this I have three canvases, my radiator and a wicker basket for my laundry. These canvases were from Argos a few years ago and were a bargain at only £10.

Next I have my desk, which again also has three drawers for storage. In these are all my school related bits and bobs and although I don't go to Sixth Form anymore, I can't throw them away. I don't actually have a chair for my desk and so where the chair would tuck under I've used it as a space for more folders, books and a place to store bags. Above the desk I also have a full length mirror.

On the desk itself I have my stereo, a digital photo frame, my perfume collection, some of my jewellery such as rings, earrings and small bracelets and I also have my sunglasses collection.

The final wall in my room is where my desk used to be. I also have another canvas and my accessories holder as well as two more photo frames. I love this canvas as it matches the theme of my room and I also love zebras! Again it was from Argos a few years ago and I think it cost around £20-£30.

My accessories holder has been one of my lifesavers. It cost £6 in the next sale two years ago and it has kept all my long jewellery such as necklaces and bangles so organised. They hardly ever get knotted together this way and I can easily find what I'm looking for. Next to this are two photo frames, which finishes off the wall.

I was going to get my cat off the bed to take this photo but then decided against it because 1. She matches the theme of the room and 2. She pretty much lives in my bedroom with me. She loves sleeping on my bed and snuggling up in the cushions and duvet and because it is a double she is able to stretch out.

These two photos just show the room in it's entirety. I've loved decorating and perfecting my room over the years and I am really proud of what I have selected and created.


